
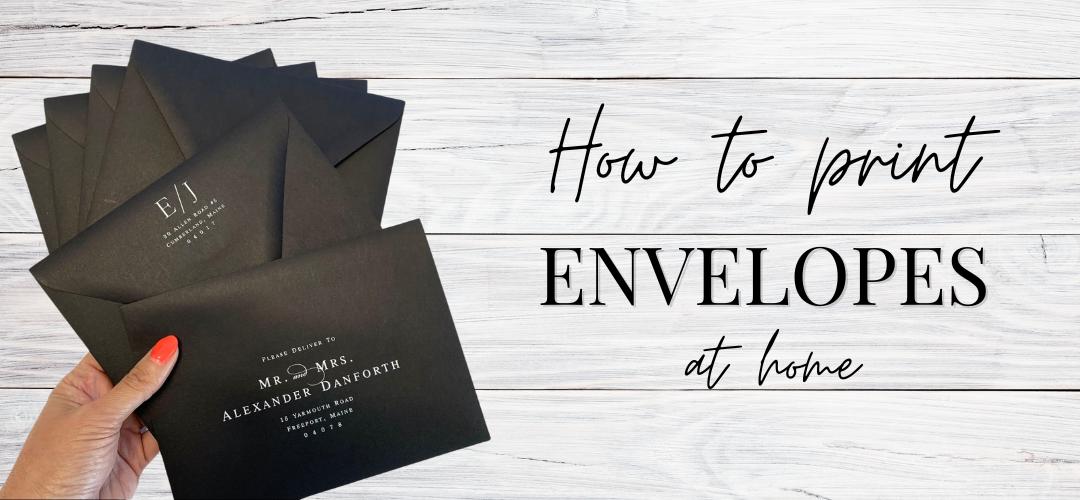
Addressing and printing invitation envelopes at home can be a real time saver over hand addressing. In this tutorial, you will learn two ways to address envelopes and step by step instructions to print them.
Method 1: Learn To Print Envelopes by Typing Each Address
Method 2: Learn Mail Merge to Address Envelopes all at Once
Method 1: Learn To Print Envelopes by Typing Each Address
Download Envelope Print Template
Download the print template for your envelope from our free print templates page. (In this tutorial, we use an A7 (5 1/4 x 7 1/4) straight flap envelope as an example.)
How to Open and Customize Template in Microsoft Word
-
-
- Open the template in Microsoft Word
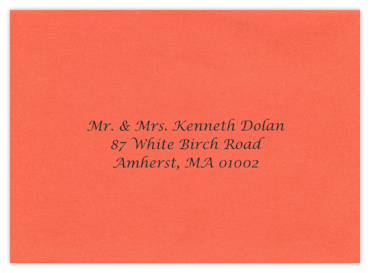
- Replace the sample address with your guest’s address
- Change fonts and colors to ones you prefer.
-
Once the address is complete, hit Return/Enter until you create an additional page in your document to type the next address into. Repeat until all addresses are entered.
How to Access Printer Driver to Enter Width, Height & Alignment
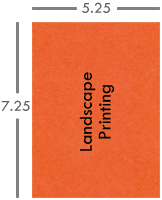
When you power on your printer, it is programmed to print 8 1/2 x 11 size paper. Even though your template is set to custom dimensions, you still need to enter your envelope’s dimensions in your print driver in order for it to print correctly. Since you loaded your envelope on its side (short edge first), the short side is referred to as the width measurement and the long side is the height measurement in the print driver. You will also need to select Landscape printing as opposed to Portrait.
| PC Instructions | Mac Instructions |
|
|
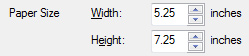
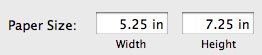
In Windows, the print driver interface is dependent on your printer manufacturer’s software, so specific instructions may vary.
 In Windows, the print driver interface is dependent on your printer manufacturer’s software, so specific instructions may vary.
Load One Test Envelope in Printer
-
-
- With the envelope aligned on its side (short edge first), the flap closed and pointing right, load a single envelope into your printer’s paper input tray. The envelope’s right edge should rest flush against the right edge of the paper tray.
- Move the sliding paper guide from left to right, resting flush against the envelope’s left edge.
-
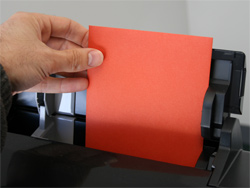
Loading envelope
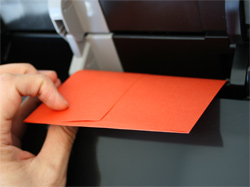
Looking behind envelope to show closed flap pointing right
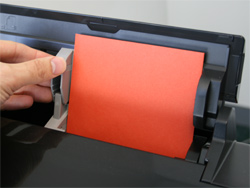
Adjusting paper guide
Print One Envelope To Test
-
-
- Click OK to save your print driver settings and close the driver
- Click OK to print
-
What To Look For When Printing
-
-
- After running through your printer, is the envelope still in excellent condition?
- How is the quality of the printing itself? Depending on the type of paper used to make your envelopes – matte, metallic, vellum, textured – your particular printer may or may not be the best choice.
-
Print Your Envelopes
Method 2: Mail Merge to Address Envelopes all at Once
Below, learn how to use Microsoft Word’s Mail Merge feature to easily address envelopes. We’ll show you how to create a template, enter addresses, set up the print driver, and finally, print the envelopes.
For this example, we use a 6 1/2 square envelope and Microsoft Office Word 2003. Steps and menus will be similar, but will vary depending on your version of Word and your operating system.
Start Mail Merge & Select Document Type
-
-
- Open Word with a blank document
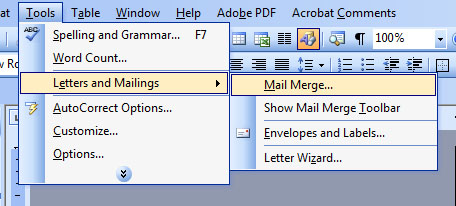
- Click Tools > Letters and Mailings > Mail Merge.
-
The Mail Merge workflow interface opens, guiding you through the rest of the process. You’re asked what type of document you’re working on.
-
-
- Select Envelopes, then continue by clicking Next.
-
Select a Starting Document
Step 2 asks “How do you want to set up your envelopes?” Choose Change document layout. Under that, click Envelope options.
A new window will open where you can choose from a list of common envelope sizes. 6 1/2 x 6 1/2 is not listed, but scroll down and click Custom, then type in the dimensions in inches. Click Ok a couple times.
Now we’re back to the document. You might have to change the zoom percentage to 100 or even less to see the entire square envelope template onscreen.
Click Next and proceed to the next step.
Select Recipients
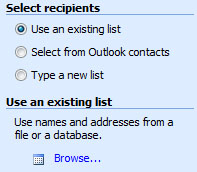
If you’ve already prepared a list of names and addresses in a database program like Excel, you can use that. You can also enter recipients’ information within Mail Merge. We’ll show you both methods, starting with a database file that we’ve already populated.
-
-
- If your recipient information is already in a database: Under “Select Recipients,” click Use an Existing List.
- Click Browse, navigate to the database file, and double click on it. Based on how the database file was set up, choose the appropriate options on the “Select Table box” and click OK.
- A new window, “Mail Merge Recipients,” appears where you can verify the formatting and remove certain recipients. Click OK to move on. Then click Next.
- If you do not already have a database populated with guests’ names and addresses:
- In Step 3, under “Select Recipients,” instead of choosing Use an Existing List, click Type a New List, then Create.
- A “New Address List” window opens where you’ll type your recipients’ information, one recipient at a time. Enter the information exactly as you’d like it to appear on your envelopes.
- Continue to create and populate new entries for as many recipients as needed. When all the recipients are entered, click Close. You’re prompted to save your recipients list so type a file name and click Save.
- Once the recipients list is in order, click Next to move on.
-
Arrange Your Envelope
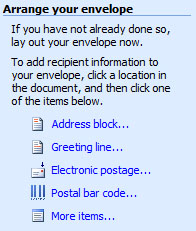
In Step 4, you’ll actually lay out the recipient information on the envelope template.
-
-
- Under “Arrange Your Envelopes,” click Address Block. The address block is a placeholder for the names and addresses that you insert into the template.
- The “Insert Address Block” window will open where you can tweak the way the information will be presented. Click OK to move on. The Address Block has been placed on the document template. Click Next to move on to step 5.
-
Preview Your Envelopes
Immediately, the address block changes to actual recipient information. Take the time to scroll through the recipients to verify that all of the names and addresses fit nicely on the template. Once you’re satisfied, move on to step 6 by clicking Next.
Complete the Merge & Print
-
-
-
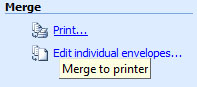
- Click Print. A “Merge to Printer” window appears.
- This is the appropriate time to print one envelope as a test.
- Click Current Record.
-
-
This prints just the record on the screen, not the entire recipients list.
-
-
-
- Click OK.
- A print window appears. Select your printer from the drop down list, then click Properties.
-
-
This brings up your printer’s driver where you can communicate to the printer that you are printing on a 6 1/2 square envelope—not an 8 1/2 x 11 sheet of copy paper. Every printer’s software will vary, so just poke around and try to find paper size, then the area to enter custom dimensions.
-
-
- Enter 6.5 inches, 650 hundredths of an inch, or whatever unit the printer driver calls for.
- Now that the printer is set to recognize the envelope size, you’re ready to print on a test sheet or envelope.
- After printing the test, if the recipient’s address is properly positioned, go ahead and print the entire list.
-
We suggest that you load 10 envelopes into your printer at a time. When you print the first batch of 10, the printer will pause so you can load more.
You may also like:
Wedding Envelopes | Envelopes by Size | Ways to Tightly Seal Envelopes | 10 Ways to Save on Mailing Wedding Invitations
7 Comments
Hi
Your video was very helpful! Thank you! I have a question about our lined envelopes. The test envelope was damaged by our printer. Can you suggest a printer that would be great for thick lined envelopes or any other tips for our problem?
Thanks,
Tracey
Hi Tracey,
Lined envelopes are quite heavy, and as you experienced, are not suitable for all home printers. Although we unfortunately can not recommend one particular printer that is great for lined envelopes, we do have a few tips for printing lined envelopes – hopefully one will work for you!
1. Use the Envelopes Setting in Your Print Driver
If your printer has an envelope setting, take advantage! All print drivers are different, but this setting is usually found in paper type, paper handling, or media. The envelope setting allows your print driver to recognize that a thicker piece of paper with a loose flap is being run through it, so it “opens up” a bit to accommodate. This setting helps prevent the flap from being caught, and may also allow your heavier envelope to feed through easier. If you printer doesn’t have an envelope setting, try setting the paper type to heavy (or a similar setting in your print driver).
2. Try Loading Envelopes into Your Printer in a Different Direction
Again, not all printers are created equally. Try loading your envelopes in different directions to see what works best for your printer – portrait or landscape. For more information on loading envelopes, please view the following article:
How to Load Envelopes in Your Printer
3. Try Printing Envelopes Open Flap
If none of the suggestions above work, try running envelopes through your printer with an open flap; this way, they are half as thick. If you do this, be sure you account for the length of the flap when setting up your document.
Thanks for your very thorough article on printing envelopes. I have a suggestion for lined envelopes. Sometimes when the envelope does not go through the printer because it is too thick, I open the flap and print with the flap open. You need to change the size of the envelope, but it does work.
Can you run a gummed flap envelope closed through the printer? Wouldn’t the pressure seal the envelope? Thank you.
In most cases, you should have no sealing issued when running a closed, gummed flap envelope through a printer – even laser printers, which get very hot after extended use.
However, if you do start to see a problem after extended use, just give you printer a break and do another batch later/
Thanks a lot, Video is very helpful.
I have a HP Photosmart C4480, and I can print envelopes. Why?