How to Print on Envelope Liners at Home
A step-by-step guide for stunning, personalized envelopes—right from your home printer.
Whether you’re planning a wedding, launching invitations for a special event, or just love pretty stationery, printing your own envelope liners is easier than you might think—and we’re here to walk you through it.
In this blog we will cover:
- Steps to Printing Euro Flap Envelope Liners at Home
- Tips & Tricks for Printing
- Free Envelope Liner Templates
Steps to Printing on your Envelope Liners at Home
Before you begin, a quick note: this tutorial is for artwork without bleeds—meaning your design doesn’t reach the edges of the paper and stays at least 1/4″ away from all sides. Many home printers can’t print all the way to the edge, so sticking to this margin helps you avoid unintended white borders.
If your artwork has a bleed or has design elements within 1/8″ from the edge and still want to diy your liners, try ordering a pack of 8.5 x 11 paper and cutting your liners from the full sheet using our Step by Step Guide to DIY Envelope Liners.
Step 1: Order Your Blank Envelope Liners
Select your favorite size, color, and quantity of liners from our vast collection of pre-cut envelope liner insert papers. Choose from nearly 80 colors and 6 versatile sizes to mix, match, and create beautiful lined Euro flap envelopes that reflect your unique style.
Pair your liners with our envelopes for a perfect stationery fit.
Step 2: Design Your Liner Artwork
Start by creating your liner design. Be sure to keep all artwork at least 1/4″ away from the outline’s edge to ensure everything prints cleanly.
You can either:
- Start with a properly-sized, blank canvas in your preferred design program or
- Download our free envelope liner templates for easy setup
If you are using a free app like Canva, simply download LCI’s liner outline and upload it into your design file. You will want to use this as a guideline when designing your liner.
Envelope Liner Sizes Available at LCI Paper
Click Your Size to Download Our Free Liner Outline Template
| A1 (4.5 x 6) | A2 (4.75 x 7.5) | A6 (5.63 x 7.88) | A7 (6.5 x 9) | A7.5 (6.75 x 9.5) | A9 (7.5 x 10) |
|---|
Step 3: Save Your File as a Print-Ready PDF
Next you will want to save your finalized artwork as a print-ready PDF (properly-sized print PDF, flattened, 300 dpi, CMYK color profile).
Be sure to remove any outlines/guidelines that you do not want printed on your finished piece.
Step 4: Rotate Your File
To align with how liner paper feeds into most printers, rotate your PDF 180 degrees—so the tapered flap points down.
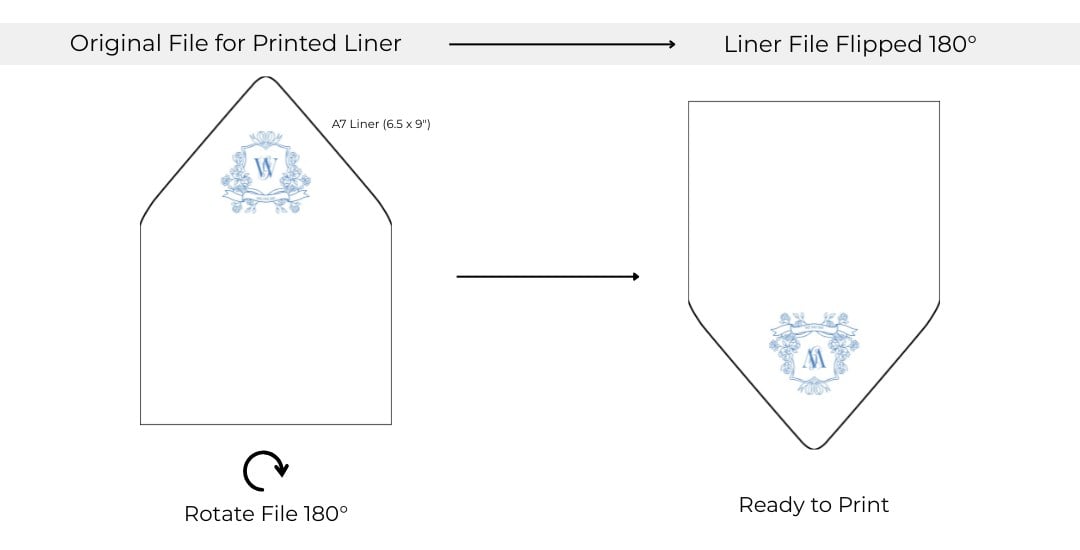
Please note: the cut lines are shown for reference only. Be sure to remove them from your print file, or they will appear on the final print.
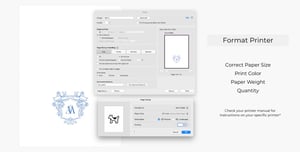
Step 5: Format Your Printer
Set your printer to match the exact paper size, then choose your paper weight, color, and quantity settings. We always recommend printing one test liner to make sure the alignment and colors look perfect before running the full batch.
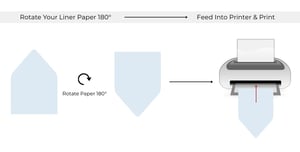
Step 6: Load Your Paper & Print
Rotate the liner paper upside down and feed it into the printer with the straight edge going in first. Then, hit print and enjoy watching your custom liners come to life!
Tips & Tricks for Printing
Keep these expert tips in mind to avoid mistakes and get the best results:
Use Our Free Templates for Easy Setup
Looking for a fast and convenient way to design your liners? Use our free downloadable templates.
Ensure Your File Size is Correct
Double check your file size against the dimensions in our product descriptions if you are unsure or click here for all of our print dimensions.
Keep the Background Pure White
To prevent unwanted color from printing, make sure your design’s background is set to pure white (#ffffff). Even a slight tint can be picked up by printers and result in accidental background printing.
Don’t Forget to Rotate Your Liner
Don’t forget to rotate both the file and the liner paper to ensure the flap design prints in the right orientation.
Understand Your Printer
Every printer behaves a little differently, so review its manual and do a quick setup test.
Test Before Printing
Always test on a single sheet before printing multiple copies—it saves time and material.
Don’t feel like printing at home? Let us print for you!
If you’d rather leave the printing to the pros, we offer professional printing on all our liner insert papers. Simply add printing to your favorite liner and upload your print-ready PDF into our design interface— we’ll take care of the rest.
You may also like:
Tips & Tricks for Lining Your Envelopes | Find My File Size | Free Wedding Stationery Checklist & Timeline | Free Downloadable Templates